Fetch data from Dynamo DB via REST API
Last Authored: Monday, July 24th, 2023By: KJ Chabra
In this tutorial, we will be exploring how to setup a REST API that fetches data from Dynamo DB.

Why?
REST API is used as an interface that allows communication from frontend to fetch data. It allows for you to register routes that perform an action such as fetch data from database or store data into database. Read More
Why use Project Compound?
Project Compound delivers a well tested solution that is self-hosted on your own AWS (all the data stays in your own domain)
Additionally it reduces time, effort and nuisances of working with API's that are rate limited
You don't need to know how to code or architect software or cloud resources (the guided UI will handle that for you)
Who is this for?
Ideally anyone who has experience with working with REST API and is looking to deploy a well tested solution of their own specifically to data that resides in their own AWS Dynamo DB
Get in touch via Twitter or Email if you have any questions regarding this tutorial.
Good to know
The UI will create a table from scratch and it will be deployed in the region you select in the Settings stage.
The API deployed will be edge optimized.
Edge-optimized API endpoint
The default hostname of an API Gateway API that is deployed to the specified Region while using a CloudFront distribution to facilitate client access typically from across AWS Regions. API requests are routed to the nearest CloudFront Point of Presence (POP), which typically improves connection time for geographically diverse clients.
Routes can only have one sibling i.e you can not create routes that have the same base but different parameter values:
/players
/players/{id}
/players/{name}
Is not allowed
/players/{id}
/players/{name}
Is not allowed
/players
/players/{id}
Is allowed
If you want to modify the stack, i.e adding or removing a route or modifying the table fetches, we recommend doing one action at a time i.e remove the route and update, then modify and update and lastly add and update.
Once you do modify the application, re-deploy the API from the Dashboard. This just ensures all the routes get updated once the stack has been re-deployed.
Due to AWS restrictions you can't change sibling names i.e
/route/{variableOne}to/route/{variableTwo}if editing a deployed stack. To get around this, delete the route first and deploy the stack. Once the stack has been deployed, you can go back into the stack and add the route with the variable name that you wanted.
Steps
Start by entering data into the Settings stage. Once all the inputs have been entered, the Next button should be clickable which will put you into the Interaction stage.

In the Interaction stage, select the AWS > REST API
This should allow you to input the name of the API. Give your API a name and click the Add Routes button.
Enter the value for route. All routes should start with the / character and can only be a max of 30 characters long. For example:
/players/teams
The routes declared above, will fetch data in a paginated manner i.e when we call the API, it will return a set of results rather than the entire dataset from the database.
Why do we want to do this?
The reason we want it to return a paginated set of results, b/c returning entire dataset is heavy. It may possibly stall the request and as the database grows, requests will keep getting longer. These resources have costs associated to them hence, to minimize the cost and make it more available to the Internet, pagination really helps.To declare a route that fetches a specific data point (Document in NoSQL, Row in SQL) from the database, we need to wrap the dynamic parameter into curly brackets. For example:
/players/{id}/players/{teamId}/players/{lastName}/players/{number}/teams/{id}/teams/{city}
Remember you can only have one sibling route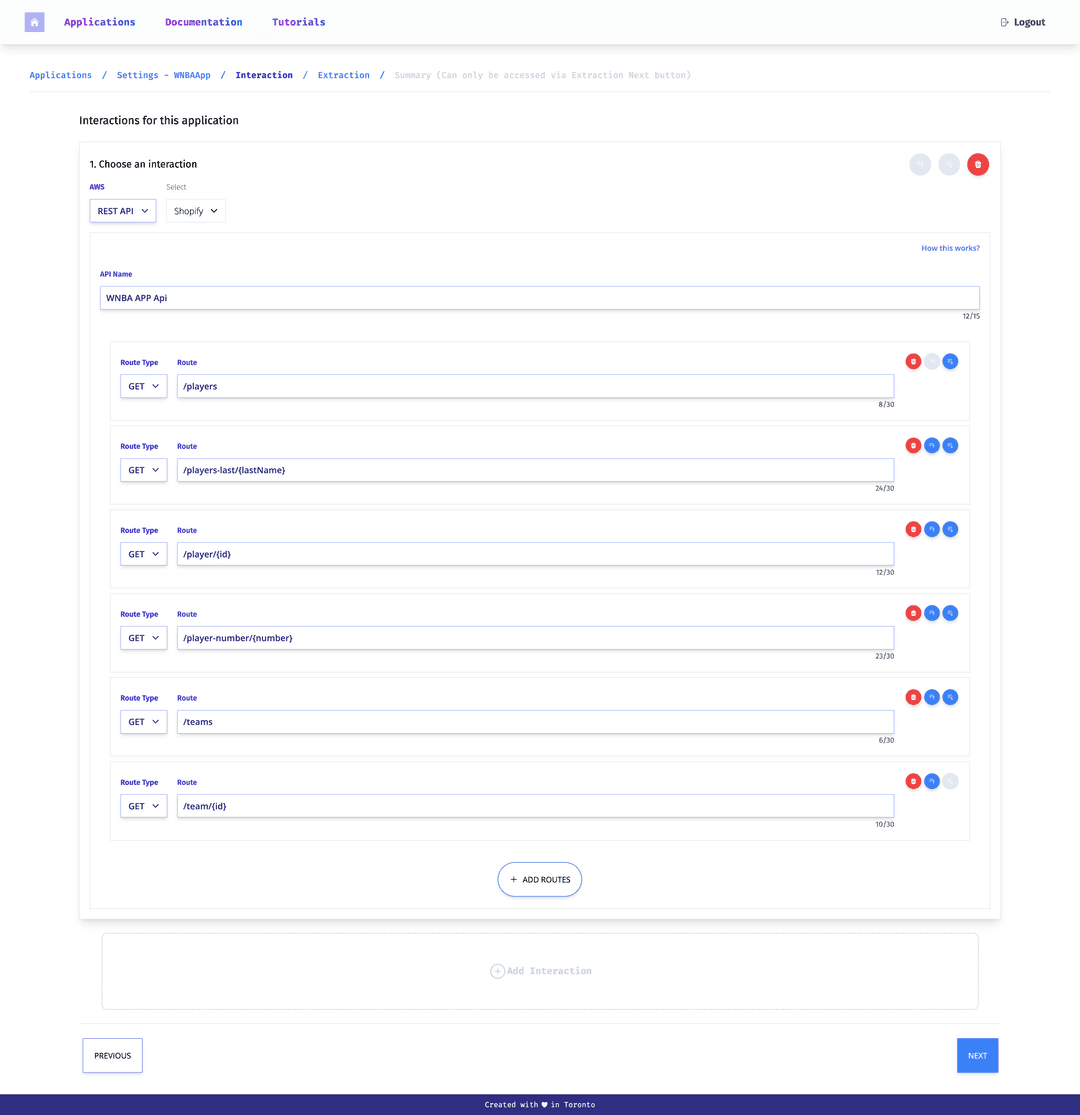
Once you are happy with routes you have declared, you can click the Next button which should take you to the Extraction stage.
In the Extraction stage, select the Dynamo DB option from the AWS dropdown menu. This will render out a UI to enter information for the table.
Simply enter the Table Name and ensure that the table field values are filled in.
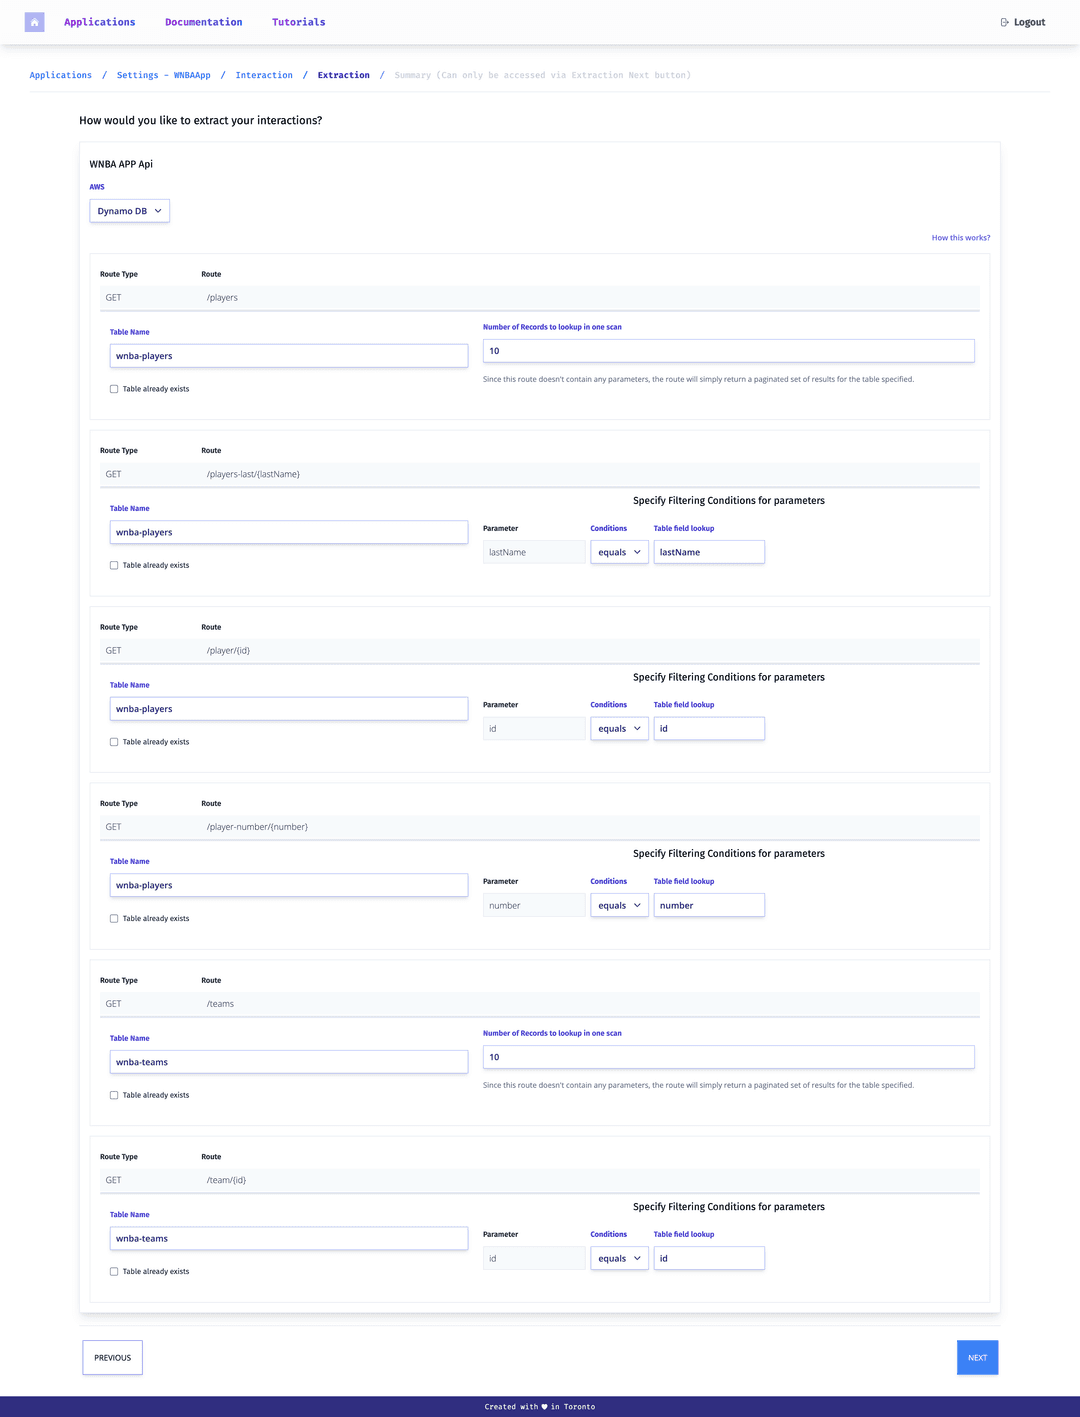
If you are modifying the stack, Table Exists option will be displayed. It should be checked by default which will enable the CHECK button which checks that the table exists in AWS. This button will also list out all possible indexes that exist on the table. If the options is checked and you enter a table that wasn't created in the app, it may possibly lead to deployment failure. Hence, you can only enter the table name that was created in the application.
Once, you are ready to deploy, click on the Next button which will place you in the Summary stage
The Summary stage lists out the summary of Settings, Interaction and Extraction phase.
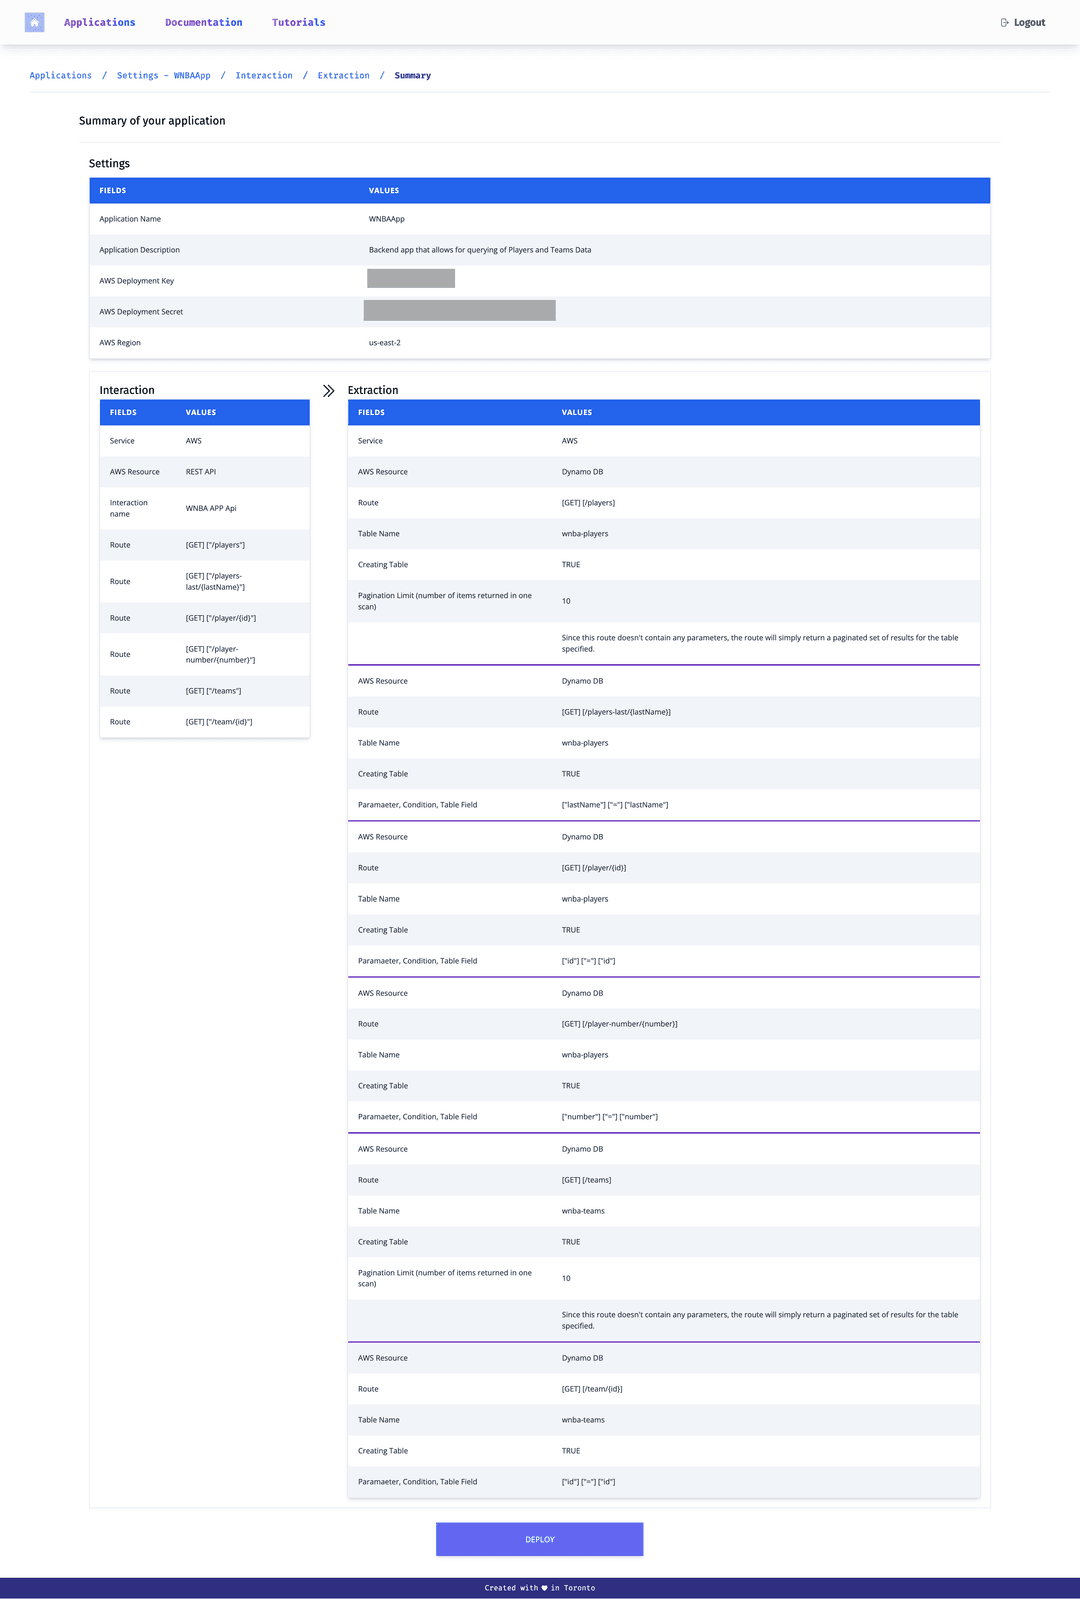
Once, the Deploy or Update button becomes enabled, you can click it and this will deploy/update the stack.
You can always edit the stack once it has been deployed hence, adding or removing routes is easily configurable.
If you make an update to the stack, remember to re-deploy the api from the dashboard.
